How to integrate Nuclei with Interactsh and Notify
- Tutorials
- by Jacob Riggs
- 11-02-2022
![]()
This is my walkthrough for installing Nuclei from ProjectDiscovery and how to integrate a suite of tools to assist with automation tasks. This includes subfinder for subdomain discovery, httpx for probing to validate live hosts, setting up your own self-hosted Interactsh server for OOB (out-of-band) testing, and how to install and configure Notify for the convenience of alerting on any identified vulnerabilities via external channels such as email, Slack, Discord, and Telegram.
Throughout this guide I'll be using a standard Kali image, though you can of course use whichever flavour of Linux you prefer.
Prerequisites
- Install Golang
sudo apt install golang - Update Golang
git clone https://github.com/udhos/update-golang
cd update-golang
sudo ./update-golang.sh - Set the golang environment module to auto
go env -w GO111MODULE=auto - Install go
wget https://go.dev/dl/go1.17.5.linux-amd64.tar.gz
sudo tar -C /usr/local/ -xzf go1.17.5.linux-amd64.tar.gz - Set the path variable within the bashrc file
echo 'export GOROOT=/usr/local/go' >> .bashrc
echo 'export GOPATH=$HOME/go' >> .bashrc
echo 'export PATH=$GOPATH/bin:$GOROOT/bin:$HOME/.local/bin:$PATH' >> .bashrc - Refresh the bashrc file
source ~/.bashrc
Install the following suite of tools (these are my baseline for optimal automation).
Interactsh
We need to set up a self-hosted Interactsh server to enable secure testing of OOB (out-of-band) vulnerabilities. To get started we need our own remote VPS. For this guide I’ll be using a Digital Ocean droplet.
- Install Interactsh
go install -v github.com/projectdiscovery/interactsh/cmd/interactsh-client@latest -
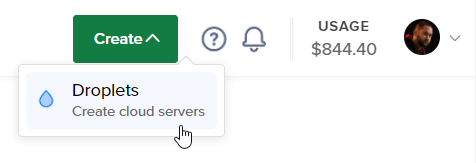
First, create a Digital Ocean account if you don’t have one already. Then in the top-right of your account dashboard, click to create a droplet.
-
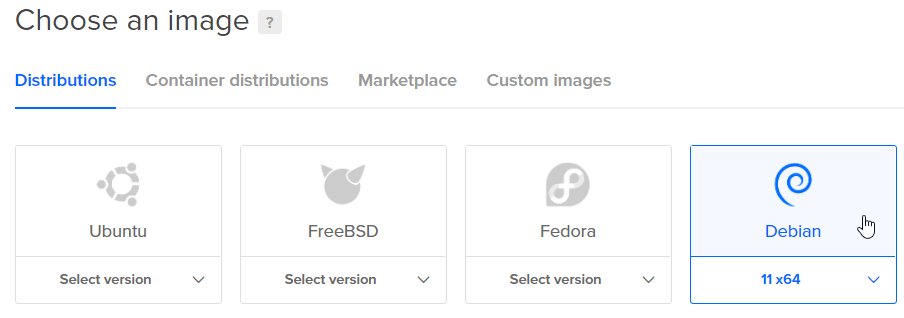
Choose a droplet image (for this example I've opted to use Debian).
-
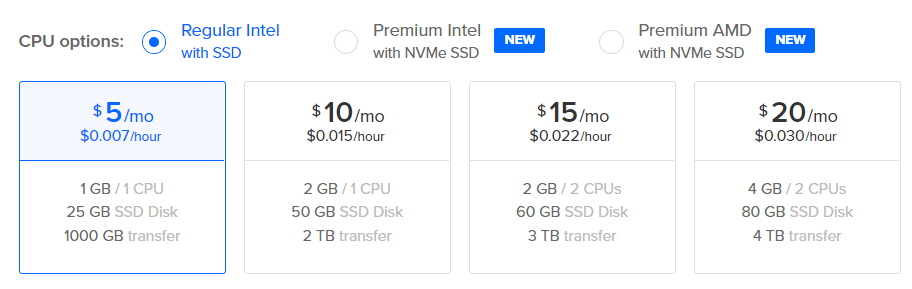
Select a droplet plan (for this example I’ve opted to go with basic).

-
Select a CPU (for this example I've opted for a single CPU).
-
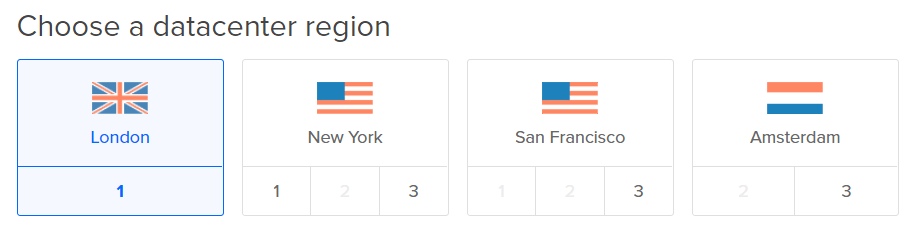
Select the region where your desired VPS will reside (for this example I’ve opted for London).
-
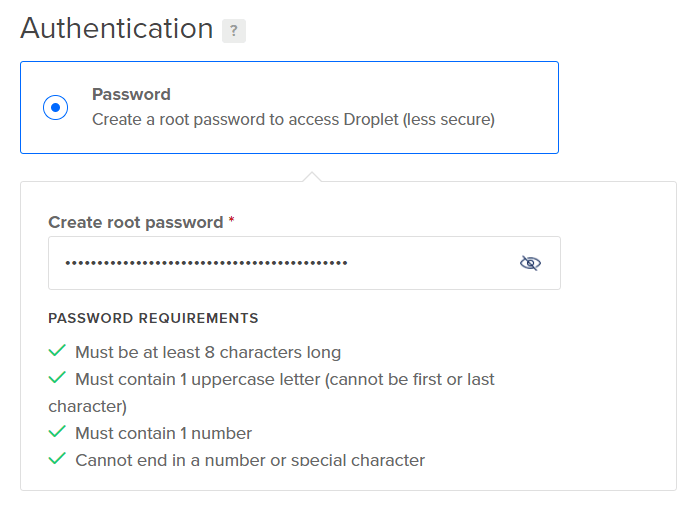
Select an authentication protocol for droplet access (for this example I’ve selected a root password).
-
Now we can create our droplet.

-
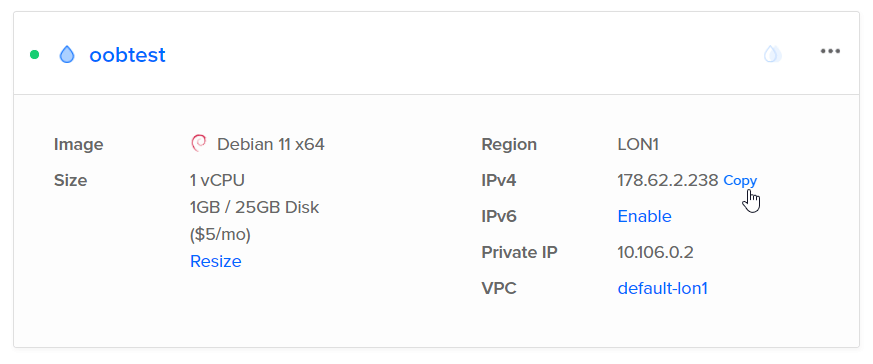
Once the droplet is created, we should take note of the public IP address, as we’ll need this later.
-
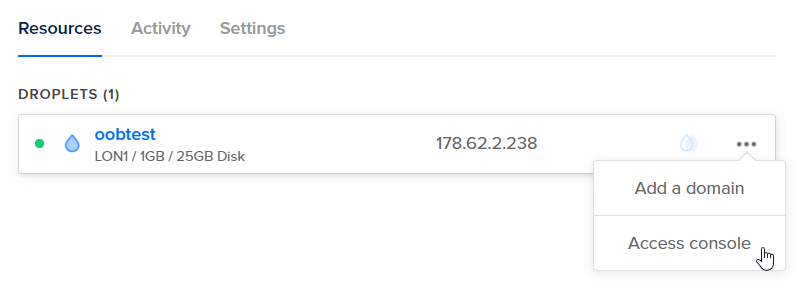
Now we can click the three dots to access the droplet console.
-
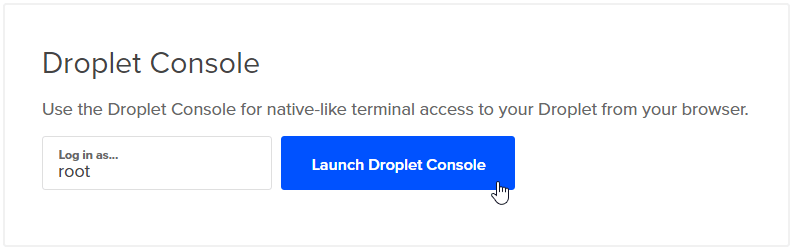
Then proceed to access the console via our web browser and login as root, using the password we defined earlier (in step 7).
- Install Interactsh on remote VPS droplet
sudo apt update
sudo apt install golang
go env -w GO111MODULE=autowget https://go.dev/dl/go1.17.5.linux-amd64.tar.gz
sudo tar -C /usr/local/ -xzf go1.17.5.linux-amd64.tar.gzecho 'export GOROOT=/usr/local/go' >> .bashrc
echo 'export GOPATH=$HOME/go' >> .bashrc
echo 'export PATH=$GOPATH/bin:$GOROOT/bin:$HOME/.local/bin:$PATH' >> .bashrcsource ~/.bashrc - Register and configure the desired domain
Next we need to register our desired domain name with our preferred domain registrar. In this guide I’ll be demonstrating the process using GoDaddy with my domain I selected for my OOB testing: oobtest.com
First we need to login to GoDaddy, navigate to our account home page, and then scroll down to our domains and click Set up to configure the desired domain DNS settings.

-
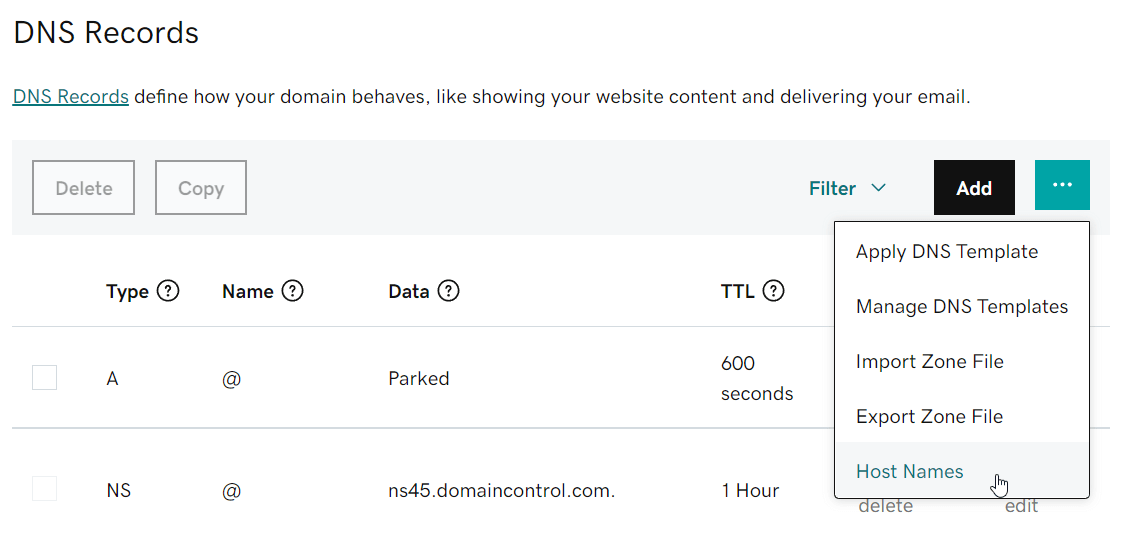
Now we click on Add and navigate to Host Names.
-
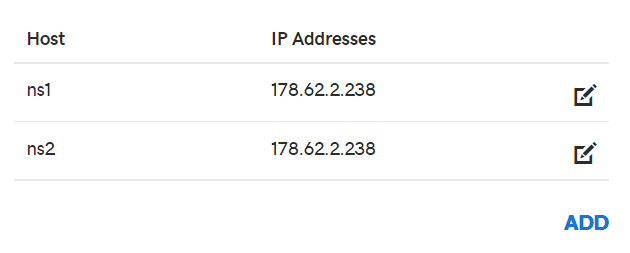
Now we add our desired hostnames, which in this case will be directing NS1 and NS2 to the public IP address of our droplet.
-
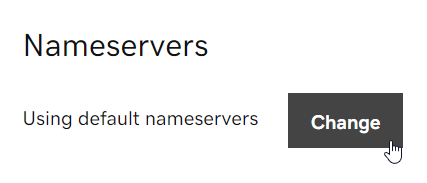
Now we can navigate back to our DNS Management page and scroll down to Nameservers. As these are configured to the default GoDaddy nameservers, we want to change them.
-
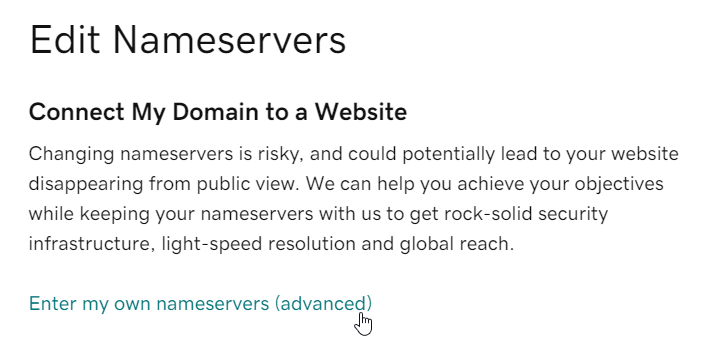
Now we can enter our custom nameservers for our domain.
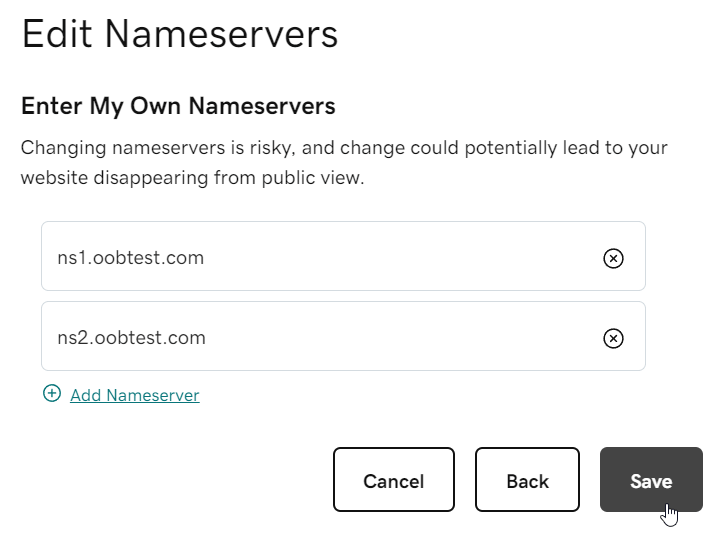
Once the nameserver configuration is saved, we will need to wait for DNS propagation to complete in the background, which usually takes a few hours. Once this is done, our OOB testing server is ready to deploy.
-
Afterwards, we can login to our droplet, and start the server.
interactsh-server -domain oobtest.com
At this stage the server is live and listening for any OOB interactions.
-
To configure the server for secure communication with the client, we can leverage the -auth flag to generate an authentication token, which will remain valid for the duration of the session.
interactsh-server -domain oobtest.com -auth
Nuclei
- Install Nuclei
go install -v github.com/projectdiscovery/nuclei/v2/cmd/nuclei@latest -
Run
nucleifor the first time to install the templates.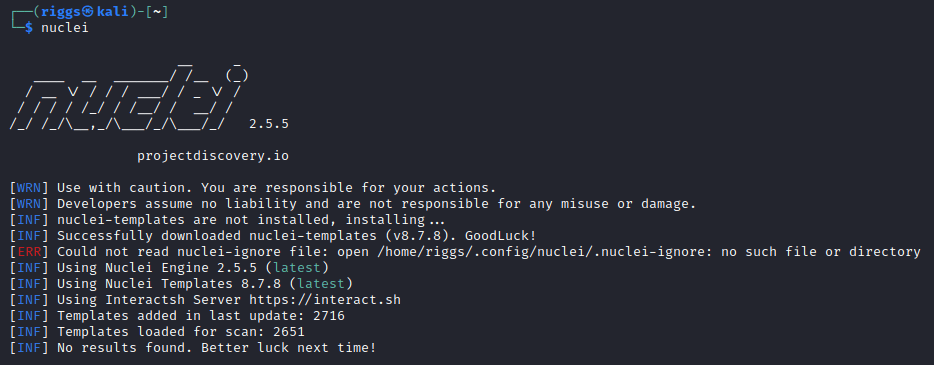
Subfinder
- Install Subfinder
go install -v github.com/projectdiscovery/subfinder/v2/cmd/subfinder@latest -
Now we need to add API keys to the Subfinder configuration file. Run
subfinderfor the first time to generate the default config file.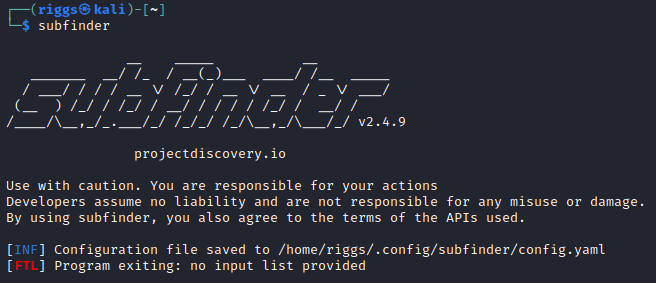
-
Now we can open and edit the configuration file.
sudo nano ~/.config/subfinder/config.yamlScroll to the bottom of the file and add your API keys for the corresponding third-party service providers. If you do not yet have API keys for the named service providers, you will need to register an account at each one and copy over the API key they issue you.
Once completed, your configuration file should look something like this:
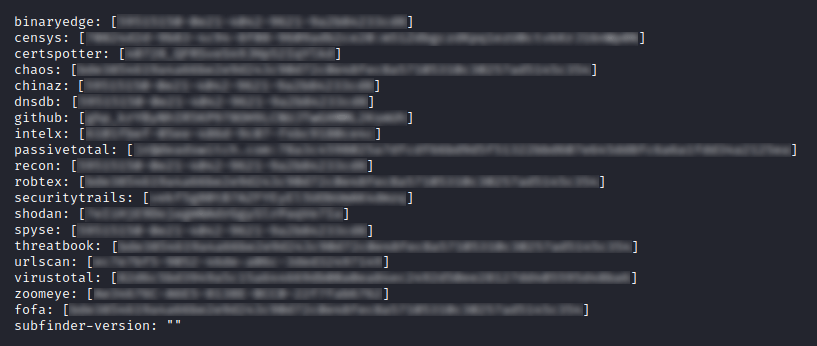
Save and exit.
httpx
- Install httpx
go install -v github.com/projectdiscovery/httpx/cmd/httpx@latest
Notify
In this example I’ll be demonstrating how to set up Notify for Discord. These steps are similar for the alternative channels which are currently supported such as Slack and Telegram.
- Install Notify
go install -v github.com/projectdiscovery/notify/cmd/notify@latest -
Set up the Notify configuration file
sudo mkdir ~/.config/notify
cd ~/.config/notify -
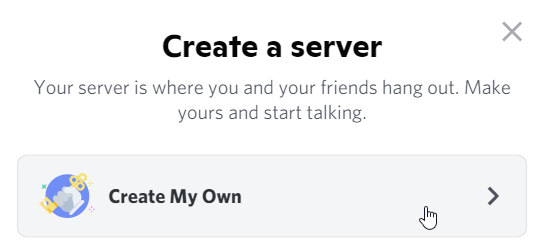
Create a Discord server
-
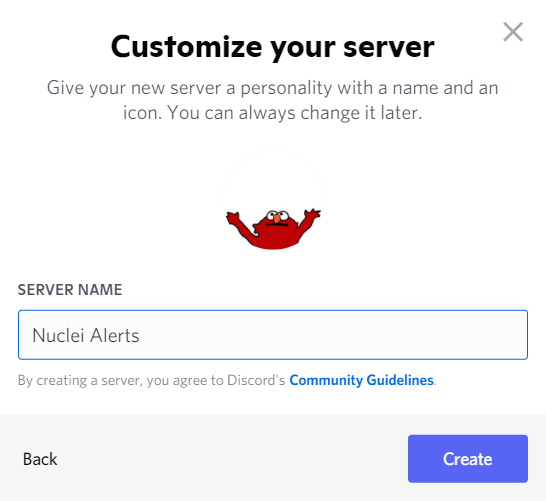
Choose a server name
-
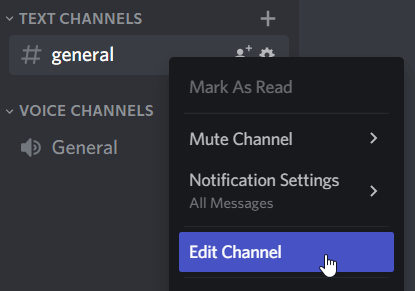
Edit channel within server
-
Change channel name to notifications

-
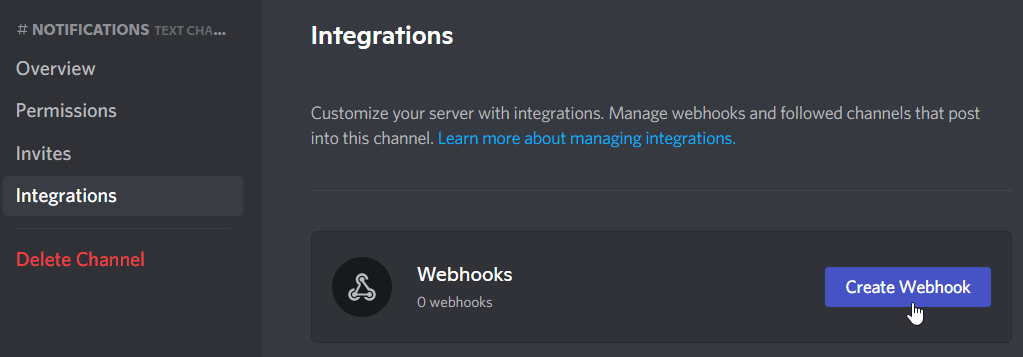
Navigate to Integrations and create a web hook for the channel
-
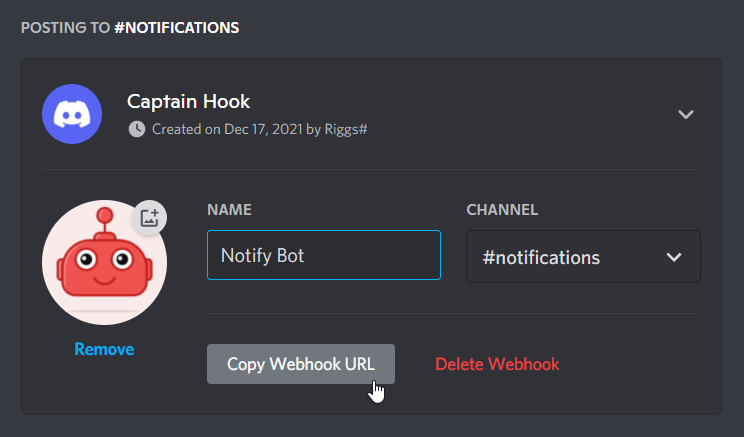
Enter the desired bot name and copy the web hook URL to clipboard
-
Now open and edit the configuration file
sudo nano provider-config.yamlEnter the following:
discord:
     - id: "Discord Server for Nuclei Alerts"
       discord_channel: "notifications"
       discord_username: "Notify Bot"
       discord_format: "{{data}}"
       discord_webhook_url: "[PASTE WEBHOOK URL HERE]"
Save and exit.
Ready to go
Now we can begin using the suite of tools together.
First we want to initialise our Interactsh client.
interactsh-client -v -server https://oobtest.com -token [INTERACTSH SERVER TOKEN]

The client communicates with the server to generate a unique subdomain ‘payload’ for OOB testing. This will listen for OOB interactions, and with the -v flag present will provide verbose logging within the terminal window for any requests it receives.
With the Interactsh client generated subdomain, and the Interactsh server generated auth token, we can feed these values into our Nuclei command to include OOB testing in our scans.
For example:
subfinder -d jacobriggs.io -o subdomains.txt | httpx -list subdomains.txt | nuclei -stats -l subdomains.txt -t takeovers/ -t cves/ -iserver "https://c6u975tmtn7kpis0l360cg6j8fayyyyyn.oobtest.com" -itoken "ac3dc1c75be69feb5a6a2d4bf126cff3b1a4fb4f8cf2f28fb8a827745302ceaf" -o vulns.txt; notify -data vulns.txt -bulk
I will briefly break down the arguments in this command below:
subfinder will enumerate the subdomains of the designated target domain and write all the subdomains it finds to a subdomains.txt file.
httpx will then probe the subdomains to validate which ones are alive.
Nuclei will then ingest the alive subdomains, run each subdomain URL through the defined template scans (in this case to check for subdomain takeovers and any vulnerabilities corresponding to known CVEs), and then output any logged findings to a vulns.txt file.
With the self-hosted Interactsh instance specified, Nuclei will auto-correlate the requests it makes with any OOB interactions it identifies on the listening Interactsh server.
Once the Nuclei scanning is complete, Notify will then parse the vulns.txt file and send a bulk alert over the webhook to the corresponding notification channel (in this case alerts will arrive in the Discord channel we set up earlier).
ABOUT THE AUTHOR