How to generate PGP keys
- Tutorials
- by Jacob Riggs
- 08-05-2020
To receive PGP encrypted emails and sign your own messages, you will need to generate your own key pair. There are both easy and advanced (best practice) ways to go about doing this. Here I will try to guide you through the process.
The easy method
Use an online third party web service such as PGP Tool.
This is simply an application layer representation of the advanced method below, where a third-party web server hosts the necessary libraries and backend functionality to generate PGP keys for you. The natural risk associated with this, however, is that relying on a third-party online web service offers no guarantee a copy of the keys you receive will not be stored, sold, or shared elsewhere.
Some web-based services generate keys client-side by using specific JavaScript libraries (such as OpenPGP.js) within your browser. Whilst this mechanism is still not as secure as the best practice methods detailed below, it provides a good balance between PGP security and day-to-day usability.
The advanced method (best practice)
![]()
Windows:
To generate PGP keys on Windows we require the latest version of the GnuPG software package Gpg4win. This is a free implementation of the OpenPGP standard which enables local key generation, encryption, and signing operations.
Once installed, run the Kleopatra application.
Navigate to File > New Key Pair and then choose the key format you want to create.
For this example we will be creating a personal OpenPGP key pair.
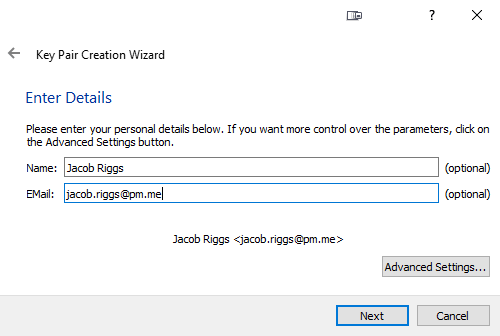
Now we need to input our name and email address values.
Then click Advanced Settings and ensure the following fields are completed as shown in the image below.
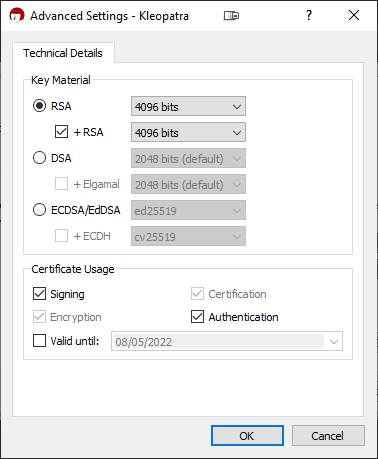
Now we can click OK and check that our key configuration is correct.
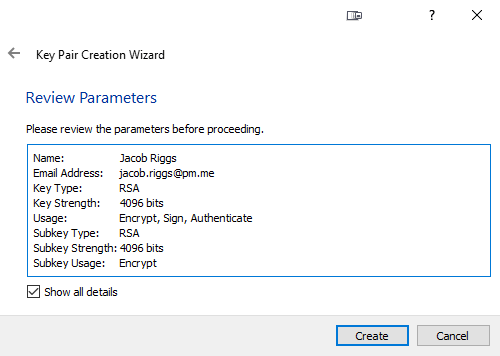
We can now click Create to generate the key pair.
We are now presented with a prompt requiring we input our desired passphrase. We must input the secure passphrase we wish to use. This is the password we will need to use each time we wish to decrypt or sign a PGP message using these keys in the future.
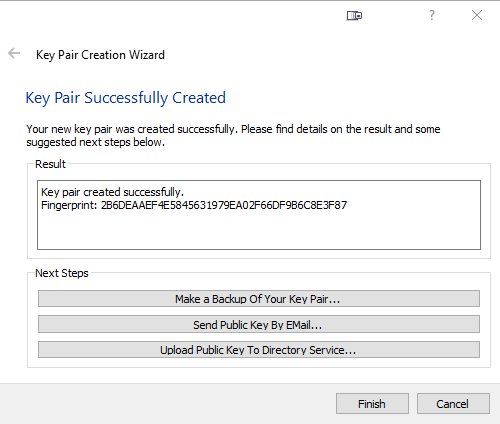
Our key pair has now successfully been generated.
![]()
Linux:
To generate PGP keys on a Linux distribution we require the latest version of GPG (GnuPG). This is a free implementation of the OpenPGP standard which enables local key generation, encryption, and signing operations.
To get started, we run the install command.
sudo apt install gnupg
Once installed, we can move on to generating our key pair. For this we use the --full-generate-key command.
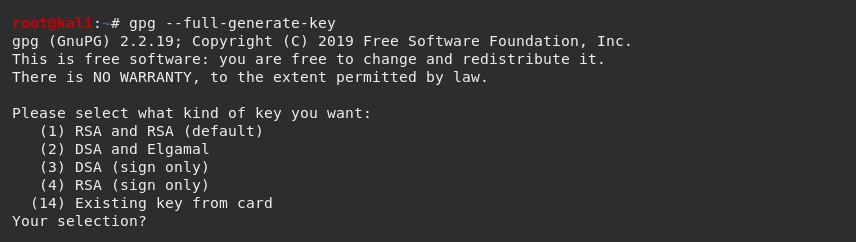
We will then be prompted to specify the type of key we want to create. We can press the Enter key to accept the default (RSA and RSA).
We must then select our desired key size, which I recommend (at the time of this blog post) is at least 4096 bits to conform with best practice.

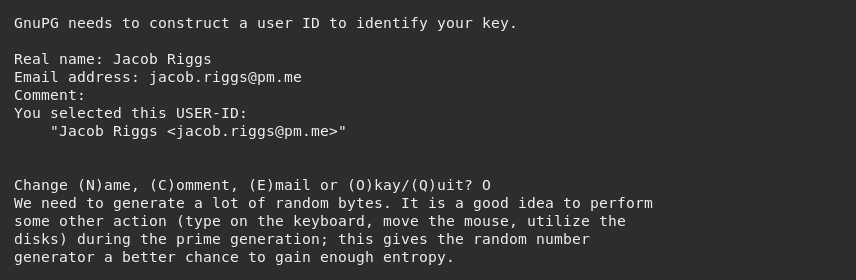
We then have the option to choose how long the keys should be valid for. In practice, this means the amount of time someone intending to communicate with you via PGP should consider that particular key pair safe for use. For this example, we do not want our keys to expire, so we press Enter as that is already selected as the default.

We will then be prompted to input specific identifier values which will reside within the core structure of the keys themselves.
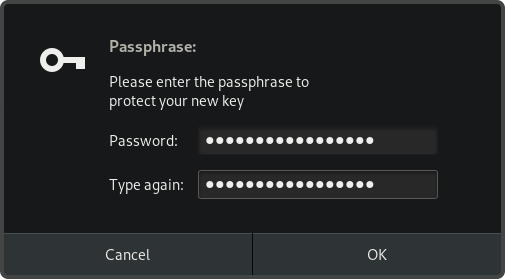
We must then input the secure passphrase we wish to use. This is the password we will need to use each time we wish to decrypt or sign a PGP message using these keys in the future.
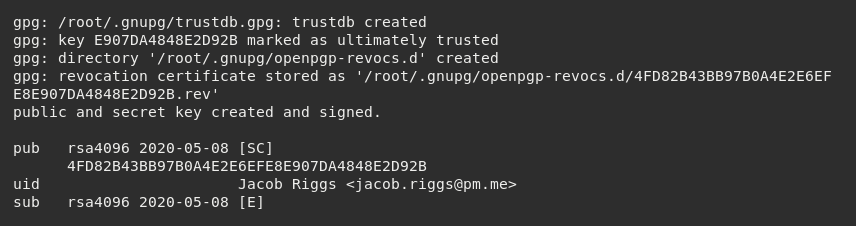
Depending on our hardware processing capabilities, we may then be prompted to generate entropy using the mouse or keyboard.

Once this process is complete, the newly generated keys will be stored internally on our GnuPG keyring. This is a location within the filesystem where PGP keys generated locally using GnuPG naturally reside.
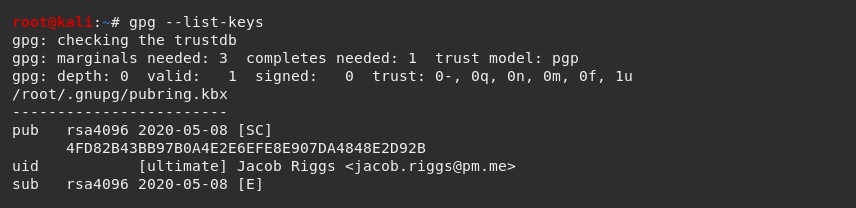
If we want to view the public keys within our keyring, we can use the --list-keys command.
If we want to view the private keys within our keyring, we can use the --list-secret-keys command.

If we want to view the fingerprint of the public keys within our keyring, we can use the --fingerprint command.

Existing PGP keys can be exported out of the keyring using the --export command.

This will write our newly generated public key to a plaintext .key file which we can publish and share online. Other parties can then use this public key to encrypt messages and send them to us securely.
To learn more about PGP keys, consider checking out my previous blog post on how PGP keys work.